Melt and Pour Soap Making: A Beginner's Guide to Crafting Beautiful Handmade Soaps
Share
We launched our Braw Wee Melt and Pour Soap Making Workshops in Autumn 2023, and they have proved to be a very popular and braw way to get creative!
So just incase you can't make it along to a workshop in person or if you've been along and need a wee reminder then here is our tutorial on using Stephensons Melt and Pour Soap bases, perfect for a beginner Whether you're a beginner looking to dip your toes into a fun and easy project or a seasoned crafter seeking a new creative outlet, we've got just the thing for you. Follow along as we guide you through the process of creating beautiful handmade soaps that will leave you feeling accomplished and your skin feeling pampered.
Step 1: Gather Your Materials - Let's Get Prepared!
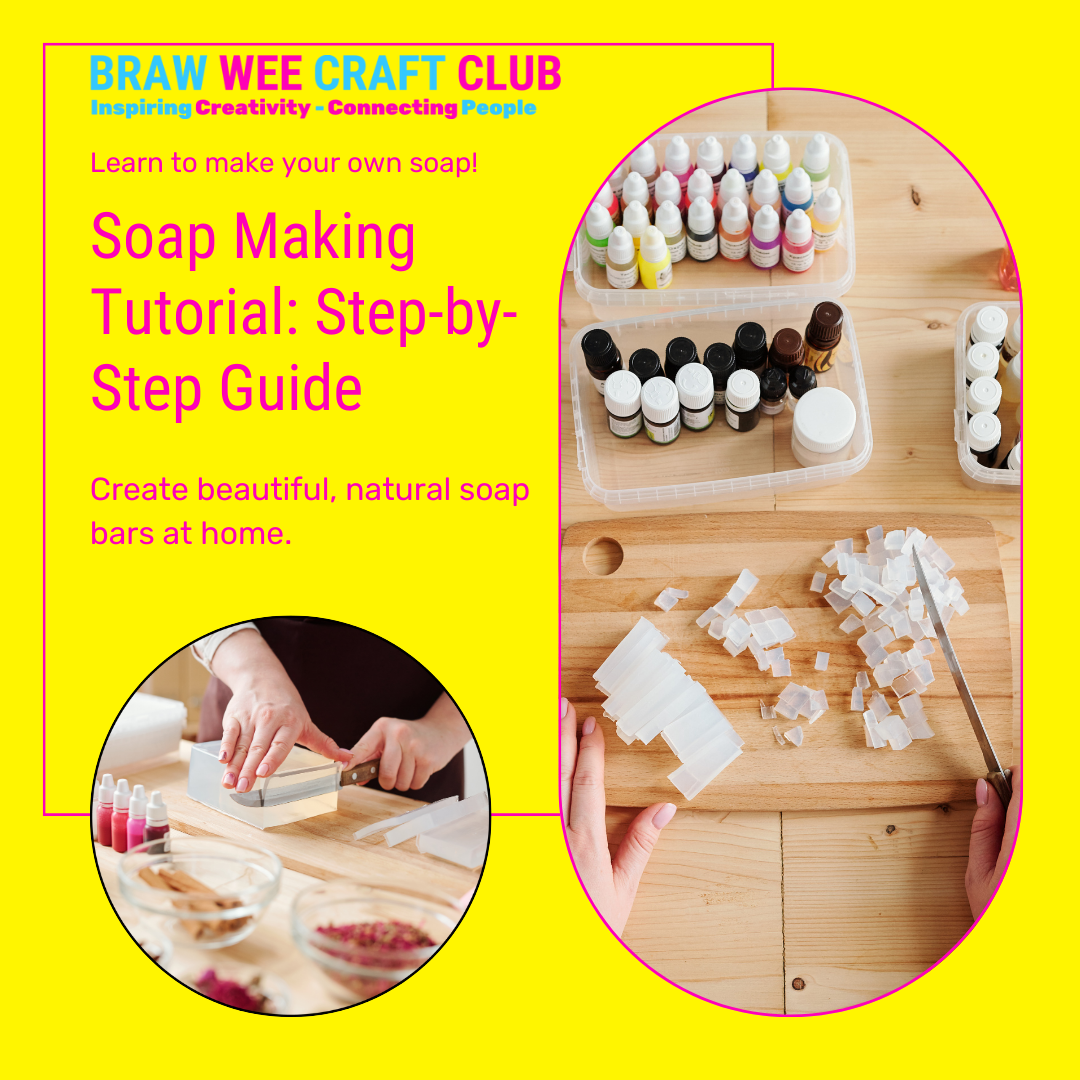
Before we dive into the soap-making adventure, it's essential to gather all the necessary materials. Take a moment to check off the items on your shopping list, ensuring you have everything you need for a smooth and enjoyable experience. A clean and organised workspace is the perfect backdrop for your soap-making adventure.
Things from your Kitchen:
- Microwave
- Sharp Knife
- Chopping Board
- Apron
- Microwavable bowls or jugs (link below for jugs if you need).
- Kitchen Scales
Shopping List:
- Stephenson Melt And Pour Soap Base Clear SLS FREE - 1Kg
- Stephenson Melt And Pour Soap Base white SLS FREE - 1Kg
- Rectangle Silicone Moulds - 6 Bars
- Assorted Soap Moulds - 20 Bars
- Food Grade Colouring
- Essential Oils
- Lagunamoon 16 Aromatherapy Fragrance Oils
- Wooden Stirrers
- Soap Making Jugs
- Alcohol Spray
You can purchase other tools if you get into it!
- Soap/ Wax melting Pot
- More silicone moulds!
Step 2: Choose Your Soap Bases - The Perfect Blend for Your Skin
Stephensons offers a range of Melt and Pour Soap Bases, each with its own unique qualities. Whether you're aiming for transparency with the Clear Soap Base, a luxurious feel with Shea Butter, a chocolatey scent with Cocoa Butter, or a moisturizing touch with Olive Oil, the possibilities for creating your custom blends are endless. Let your imagination run wild as you mix and match to find your perfect combination.
In our workshops, we use the clear and white SLS bases, but you have lots of choices!
Step 3: Cut and Melt the Soap Bases
Now that you have your soap bases ready, it's time to cut them into small, uniform cubes. This step ensures even melting and easy handling. Place the cubes into separate microwave-safe bowls and melt them in short intervals of 30 seconds each, stirring between each round until they are completely melted. For the rectangle moulds recommended above you need about 100g of soap base and for the pack of 20 about 90g of soap base.
Step 4: Add Fragrance and Color - Scented Delights
To elevate your soap creation to new heights, it's time to add a few drops of fragrance oil to each melted soap base - you need at least 2% of the volume of your melted base - so for 100g that is 2g which is roughly 15/ 20 drops. Choose scents that speak to your senses, whether it's the freshness of lavender or the invigorating aroma of citrus.
Next, mix in soap colouring to achieve your desired hue. Whether you opt for vibrant and bold or subtle and pastel, the choice is yours - always start with a couple of drops and then add more until you get your desired colour.
Step 5: Pour into Moulds - Unleash Your Artistic Side
Spray the mould with your Alcohol Spray to help with bubbles and demoulding the soap.
Place your silicone soap moulds on a flat surface, ready to receive the liquid soap - even better if you can place it on a tray. Pour the melted soap bases into the moulds, layering colours if you wish to create a striking visual effect. Feel free to experiment with different colour combinations and let your creativity shine.
For layering soap make sure you leave about 10 minutes between pours and spray with the alcohol in between layers too.
Some other ideas are using wooden craft sticks to create swirls, patterns, or even intricate designs in your soap moulds. Dividing your base into two, creating two different colours and pouring them into the mould simultaneously for a marbling effect, adding botanicals to your soaps or even other premade soap shapes into your clear base to create your own little soapy scenes!
Let your imagination guide your hands as you unleash your inner artist. Remember, each soap creation is a unique masterpiece in its own right.
Spray again with Alcohol Spray once you have finished your pour to eliminate any wee bubbles!
Step 6: Allow to Set - Patience is a Virtue
Give your soaps time to cool and set for at least 1 hour. If you're eager to see the final result, you can speed up the process by placing them in the refrigerator. As the soaps solidify, anticipation builds, and you're one step closer to holding your handmade creations in your hands.
Step 7: Unmould Your Soaps - Reveal Your Masterpieces
Once fully set, it's time for the grand reveal! Carefully pop the soaps out of the moulds. Thanks to the wonders of silicone, they should release easily, unveiling the stunning designs you've crafted with your own hands.
Step 8: Finishing Touches - Polishing Your Creations
To add those final touches of perfection, trim any excess edges with a sharp knife. This step ensures clean lines and a professional finish. Your soaps are now ready to shine in all their glory.
Step 9: Enjoy or gift your new creations!
Congratulations! You've successfully embarked on a soap-making adventure using Stephenson's Melt and Pour Soap Bases. Your newfound skills are sure to impress, and the satisfaction of creating something beautiful with your own hands is truly rewarding.
Remember to share your creations with the Braw Wee Craft Club community, where like-minded craft enthusiasts can celebrate your achievements. Happy crafting!
If you fancy joining our workshop then check out the workshop booking page here